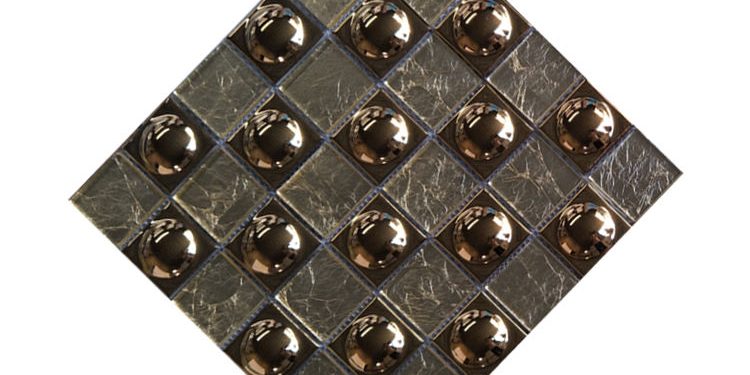
Using glass tile in kitchens can elevate the space with a touch of elegance, modernity, and color. Here are some ideas and tips for incorporating glass tile into your kitchen:
### 1. **Backsplashes**
**Classic Backsplash**:
– **Subway Tiles**: Use classic 3×6 inch glass subway tiles in a single color for a sleek, timeless look.
– **Mosaic Tiles**: Create a mosaic backsplash with small glass tiles in varying shades for a dynamic and artistic effect.
**Patterned Backsplash**:
– **Herringbone Pattern**: Arrange rectangular glass tiles in a herringbone pattern for a sophisticated, textured look.
– **Chevron Pattern**: Use glass tiles in a chevron pattern to add visual interest and modern style.
**Accent Backsplash**:
– **Accent Strips**: Add a strip of decorative glass tiles within a ceramic or stone tile backsplash for a pop of color and shine.
– **Geometric Patterns**: Create geometric designs with glass tiles to make a bold statement.
### 2. **Countertops**
**Glass Tile Countertops**:
– **Glass Tile Sheets**: Use glass tile sheets to cover countertops, creating a unique and vibrant surface.
– **Mixed Materials**: Combine glass tiles with other materials like granite or wood for a mixed-media countertop.
### 3. **Kitchen Islands**
**Island Fronts**:
– **Full Coverage**: Cover the entire front of a kitchen island with glass tiles to create a striking focal point.
– **Accent Panels**: Use glass tiles to create accent panels on the island, highlighting specific areas.
### 4. **Cabinet Accents**
**Cabinet Fronts**:
– **Glass Tile Inlays**: Add glass tile inlays to cabinet doors for a custom, high-end look.
– **Glass Tile Backs**: Line the back of glass-front cabinets with glass tiles for added color and depth.
### 5. **Shelving and Niches**
**Decorative Shelving**:
– **Glass Tile Shelves**: Install glass tile-covered shelves to display decorative items or store kitchen essentials.
– **Niches**: Create niches lined with glass tiles in the backsplash or wall for extra storage and decoration.
### 6. **Flooring**
**Glass Tile Flooring**:
– **Accent Tiles**: Use glass tiles as accents in a tile or wood floor to add sparkle and color.
– **Full Coverage**: Cover small areas, such as the entryway to the kitchen, with glass tiles for a striking entrance.
### Tips for Using Glass Tile in the Kitchen:
1. **Color Coordination**:
– Choose glass tile colors that complement your existing kitchen decor, such as countertops, cabinetry, and wall colors.
2. **Lighting**:
– Enhance the natural reflectivity of glass tiles by installing under-cabinet lighting. This can create a stunning effect and make the tiles sparkle.
3. **Size and Scale**:
– Consider the size of the kitchen when choosing tile size. Larger tiles can make a small kitchen feel more spacious, while smaller tiles can add intricate detail to larger spaces.
4. **Grout Color**:
– Use a grout color that complements or contrasts with the glass tiles. Light grout can make the tiles stand out, while dark grout can create a more subdued, uniform look.
5. **Installation**:
– Ensure proper installation by using the right adhesive and tools. Glass tiles require precision and care during installation to prevent breakage and ensure a smooth finish.
6. **Maintenance**:
– Glass tiles are easy to clean and maintain, but be sure to seal the grout to prevent stains and moisture damage. Regular cleaning with a mild detergent will keep the tiles looking their best.
### DIY Installation Steps for a Glass Tile Backsplash:
1. **Prepare the Surface**:
– Clean and dry the wall where the tiles will be installed. Remove any grease, dirt, or debris.
2. **Measure and Plan**:
– Measure the area and plan the layout of your tiles. Mark the center point and use a level to draw guidelines.
3. **Cut Tiles as Needed**:
– Use a wet saw or tile cutter to cut the glass tiles to fit around outlets, edges, and corners. Wear safety goggles and gloves.
4. **Apply Adhesive**:
– Spread tile adhesive on the wall using a notched trowel. Work in small sections to prevent the adhesive from drying out before the tiles are set.
5. **Set the Tiles**:
– Press the tiles into the adhesive, using spacers to ensure even spacing. Check for level and alignment as you go.
6. **Grout the Tiles**:
– Once the adhesive is dry, apply grout with a grout float, pressing it into the gaps between the tiles. Wipe off excess grout with a damp sponge.
7. **Seal the Grout**:
– After the grout has cured (usually 24-72 hours), apply a grout sealer to protect against stains and moisture.
8. **Final Cleaning**:
– Clean any remaining grout haze from the tiles with a soft cloth and a mild cleaner.
By incorporating glass tiles into your kitchen design, you can create a beautiful, reflective, and vibrant space that feels modern and luxurious.


