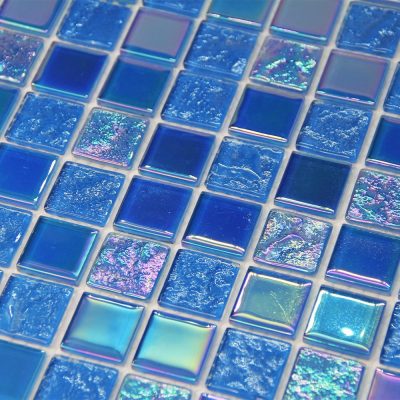
DIY glass tile projects can be fun and rewarding, allowing you to add a personal touch to your home decor. Here are several ideas, complete with step-by-step instructions:
### 1. **Glass Tile Coasters**
**Materials Needed**:
– Small glass tiles (1×1 inch)
– Cork or felt pads
– Clear adhesive
– Grout
– Grout sealer (optional)
– Sponge
– Soft cloth
**Instructions**:
1. **Arrange Tiles**: Layout four or more tiles in a square pattern.
2. **Adhere Tiles**: Apply clear adhesive to the back of each tile and press them onto a piece of cork or felt.
3. **Grout**: Once the adhesive is dry, apply grout between the tiles. Wipe away excess grout with a damp sponge.
4. **Seal**: If desired, apply a grout sealer for added protection.
5. **Finish**: Attach cork or felt pads to the bottom of the coaster to prevent scratches on surfaces.
### 2. **Glass Tile Mirror Frame**
**Materials Needed**:
– Plain mirror
– Glass tiles
– Tile adhesive
– Grout
– Grout float
– Sponge
– Painter’s tape
**Instructions**:
1. **Tape Mirror Edges**: Use painter’s tape to cover the edges of the mirror where you don’t want adhesive or grout.
2. **Apply Adhesive**: Spread tile adhesive around the border of the mirror.
3. **Set Tiles**: Place glass tiles onto the adhesive, pressing firmly.
4. **Grout**: Once the adhesive is dry, grout the spaces between the tiles and wipe off excess grout with a damp sponge.
5. **Clean Up**: Remove the painter’s tape and clean any remaining grout residue.
### 3. **Glass Tile Tray**
**Materials Needed**:
– Wooden tray
– Glass tiles
– Tile adhesive
– Grout
– Grout float
– Sponge
– Sealant (optional)
**Instructions**:
1. **Prepare Tray**: Sand and clean the tray to ensure the adhesive will stick well.
2. **Arrange Tiles**: Lay out the glass tiles in your desired pattern inside the tray.
3. **Apply Adhesive**: Spread tile adhesive on the bottom of the tray and press the tiles into place.
4. **Grout**: Once the adhesive has dried, fill the gaps with grout and clean off the excess with a damp sponge.
5. **Seal**: Apply a sealant if desired for extra protection against spills and stains.
### 4. **Glass Tile Backsplash**
**Materials Needed**:
– Glass tiles
– Tile adhesive
– Notched trowel
– Grout
– Grout float
– Tile spacers
– Level
– Wet saw or tile cutter
– Sponge
**Instructions**:
1. **Measure and Plan**: Measure the area and plan your tile layout, starting from the center and working outward.
2. **Cut Tiles**: Cut tiles as necessary using a wet saw or tile cutter.
3. **Apply Adhesive**: Spread tile adhesive on the wall with a notched trowel.
4. **Set Tiles**: Press tiles into the adhesive, using spacers to ensure even spacing. Check for level regularly.
5. **Grout**: After the adhesive has dried, grout the tiles and wipe off the excess with a damp sponge.
6. **Clean**: Once the grout is set, clean any remaining haze from the tiles.
### 5. **Glass Tile Garden Stepping Stones**
**Materials Needed**:
– Concrete stepping stones
– Glass tiles
– Tile adhesive
– Grout
– Grout float
– Sponge
**Instructions**:
1. **Clean Stones**: Clean the surface of the concrete stepping stones.
2. **Arrange Tiles**: Plan your design by arranging the glass tiles on the stepping stone.
3. **Adhere Tiles**: Apply tile adhesive to the stone and press the tiles into place.
4. **Grout**: Once the adhesive is dry, fill the gaps with grout and wipe off excess with a damp sponge.
5. **Seal (optional)**: Apply a grout sealer if desired to protect from the elements.
### Tips for All Projects:
– **Safety First**: Always wear safety goggles and gloves when cutting tiles.
– **Proper Adhesive**: Use the appropriate adhesive for the surface you’re working on.
– **Grout Sealer**: Consider using a grout sealer to protect your project from stains and moisture.
– **Clean Regularly**: Keep the tiles clean to maintain their appearance and longevity.
These DIY projects can add a touch of personal style and creativity to your home. Enjoy your crafting


