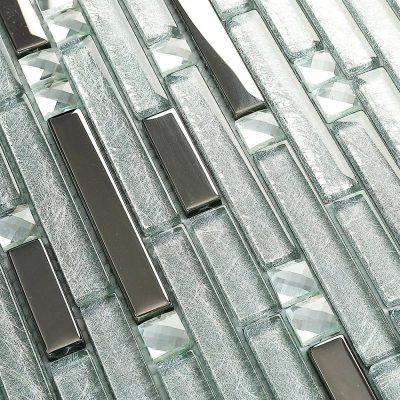
Installing glass tile can be a rewarding DIY project, but it requires careful planning and attention to detail to achieve professional-looking results. Here’s a step-by-step guide to help you through the process:
1. **Gather Materials and Tools**:
– Glass tiles
– Tile adhesive (thin-set mortar)
– Notched trowel
– Tile spacers
– Tile cutter or wet saw
– Tile nippers (for cutting small or irregular pieces)
– Grout
– Grout float
– Sponge
– Tile sealer (optional)
– Protective gear (gloves, safety glasses)
2. **Prepare the Surface**:
– Ensure that the surface where you’ll be installing the glass tile is clean, dry, and free of any debris or grease.
– If you’re tiling over drywall, apply a coat of primer to seal the surface and improve adhesion.
3. **Plan Your Layout**:
– Use a pencil and a straightedge to create layout lines on the wall, indicating where the tiles will be placed.
– Dry-fit the tiles on the wall to determine the best arrangement and make any necessary cuts.
4. **Mix the Adhesive**:
– Follow the manufacturer’s instructions to mix the tile adhesive to the proper consistency.
– Use a drill with a mixing paddle attachment for large batches, or mix by hand for smaller areas.
5. **Apply Adhesive to the Wall**:
– Use the flat side of the trowel to spread a thin layer of adhesive onto the wall, covering an area that you can tile within 15-20 minutes.
– Use the notched side of the trowel to create grooves in the adhesive, which will help ensure proper adhesion.
6. **Install the Tiles**:
– Place the glass tiles onto the adhesive, pressing firmly to ensure good contact.
– Use tile spacers to maintain consistent spacing between tiles.
– Work in small sections at a time, applying adhesive and installing tiles as you go.
7. **Cut Tiles to Size**:
– Use a tile cutter or wet saw to cut tiles to fit around edges, corners, and obstacles.
– For small or irregular cuts, use tile nippers to carefully trim the tiles to the desired shape.
8. **Allow Adhesive to Cure**:
– Allow the adhesive to cure for the time specified by the manufacturer before grouting. This is typically 24-48 hours.
9. **Grout the Tiles**:
– Mix the grout according to the manufacturer’s instructions.
– Use a grout float to apply the grout to the spaces between the tiles, pressing it into the joints at a 45-degree angle.
– Remove excess grout with the edge of the float, then clean the tiles with a damp sponge.
10. **Seal the Grout** (optional):
– Once the grout has cured for the specified time, consider applying a grout sealer to protect it from stains and moisture. Follow the manufacturer’s instructions for application.
11. **Enjoy Your New Glass Tile Installation**:
– Once the grout and any sealer have fully cured, step back and admire your handiwork! Your newly tiled space should be beautiful and ready to enjoy.
Remember to take your time and work carefully, especially when cutting and installing the glass tiles, to ensure a professional-looking finish. If you encounter any challenges along the way, don’t hesitate to seek advice from experts or refer to additional DIY resources.


